Documenting Rental Walk-Throughs for Tenants
Learn how to thoroughly document your move‑in and move‑out walk‑throughs to protect your security deposit and avoid disputes with your landlord.
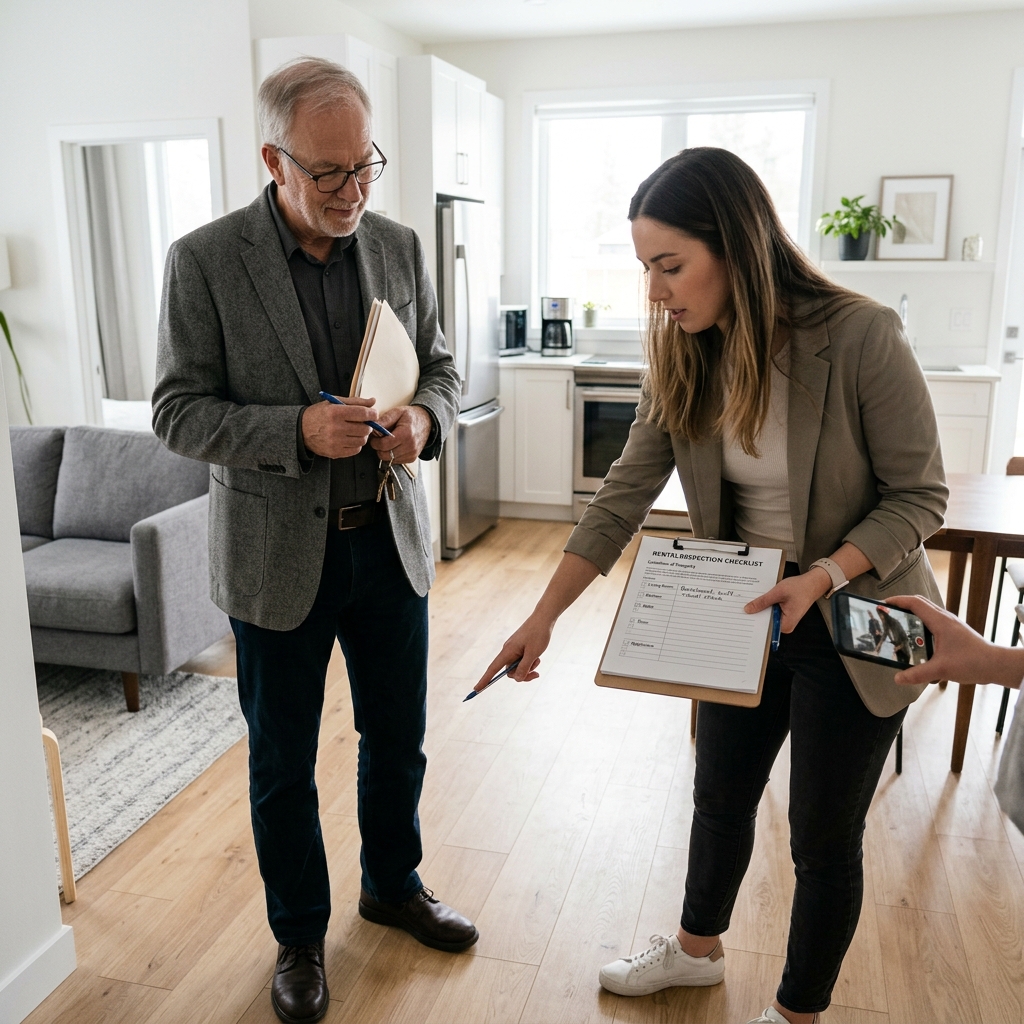
When you move into or out of a rental home, the condition of the property can determine whether you receive your full security deposit back or end up in a dispute with your landlord. Carefully documenting move-in and move-out walk-throughs is one of the most effective ways to protect yourself and keep the process stress‑free.
This guide explains what to document, how to use checklists, photos, and videos, and what tenants should do before signing any inspection forms. It is written from a tenant’s perspective, but landlords can also use it to understand what a thorough, fair inspection looks like.
Why Walk-Through Documentation Matters
A walk-through is a joint inspection of the rental unit by the tenant and landlord (or property manager) at the start and end of a lease. The inspection record is often used to decide whether the tenant is responsible for any damage beyond normal wear and tear, which may lead to security deposit deductions.
Several key reasons make documentation essential:
- Security deposit protection: A clear record helps show which issues existed before you moved in and which occurred later, reducing unfair deductions.
- Evidence in disputes: Photos, videos, and written checklists provide objective evidence if disagreements arise about damage or cleanliness.
- Maintenance and safety: Early documentation highlights problems such as faulty outlets, leaky plumbing, or missing smoke detectors so they can be repaired promptly.
- Transparency with your landlord: Being thorough demonstrates that you are responsible and may improve communication throughout your tenancy.
Understanding Move-In vs. Move-Out Walk-Throughs
Although both inspections focus on the condition of the property, they serve different purposes and require slightly different strategies.
Move-In Walk-Through
The move-in walk-through occurs just before or on the day you take possession of the rental. Many landlords provide a move-in checklist for tenants to complete within a few days of moving in.
During this inspection, your goals are to:
- Identify any existing damage, wear, or malfunctioning items before you bring in furniture or start using the unit.
- Ensure important systems like plumbing, electrical outlets, heating, cooling, smoke detectors, and appliances are functioning.
- Document cosmetic issues such as scratches, stains, or worn flooring so you are not blamed for them later.
Ideally, you complete the move-in checklist together with the landlord and both parties sign it. Some official checklists recommend completing this within three days of moving in and having both tenant and landlord agree on the property’s condition.
Move-Out Walk-Through
The move-out walk-through happens when you vacate the property, after your belongings have been removed and cleaning is complete. Many landlords also conduct a preliminary inspection a week or two before move-out to give tenants time to address issues.
During move-out, documentation serves to:
- Show that you restored the property as close as possible to its move-in condition, allowing for reasonable wear and tear.
- Highlight damage or cleaning tasks that may be deducted from the deposit, ideally with an itemized list.
- Provide before‑and‑after evidence through checklists, photos, and videos to support the inspection findings.
What to Document at Move-In
Using a structured checklist for every room helps ensure you do not overlook important details. Many government and housing agencies provide formal move-in/move-out forms for this purpose. Below are the key areas to examine and document when you first move in.
Doors, Windows, and Security Features
- Entry doors: Note scratches, dents, gaps, or issues with locks and deadbolts. Confirm keys work smoothly and that the door closes securely.
- Interior doors: Check that doors open and close properly, latch correctly, and are free of holes or major damage.
- Windows: Document cracked glass, damaged frames, or difficulty opening and closing. Check that locks work and that screens and coverings are present and intact.
- Safety devices: Test smoke and carbon monoxide detectors and verify that any fire extinguisher is properly inspected and accessible.
Floors, Walls, and Ceilings
The surfaces of the home reveal a lot about prior use. These items should be documented room by room:
- Flooring: Note stains, burns, warped boards, torn carpet, or loose tiles. Take close‑up photos of any problem areas.
- Walls: Record holes, scuff marks, chipped paint, or patched areas. Pay attention behind doors where impact damage is common.
- Ceilings: Look for water stains, cracks, peeling paint, or signs of past leaks, especially near bathrooms and kitchens.
Plumbing and Water Fixtures
- Faucets and sinks: Test hot and cold water, water pressure, and drainage. Check for leaks under sinks.
- Showers and tubs: Inspect grout, caulking, and fixtures. Document any discoloration or mold and verify proper drainage.
- Toilets: Flush several times to ensure proper operation, check for leaks around the base, and note any wobbling.
Electrical, Lighting, and Outlets
- Outlets: Test outlets with a small device or lamp to ensure they are working. Note any loose or damaged covers.
- Light fixtures: Verify switches work, bulbs are present, and fixtures are securely mounted. Document missing bulbs or cracked covers.
- Heating and cooling: Test thermostats, vents, and units (such as radiators or air conditioners) to confirm they function correctly.
Appliances and Built-In Features
Any appliance included in your lease should be inspected and documented at move‑in.
- Kitchen appliances: Run the stove burners, oven, refrigerator, freezer, dishwasher, and microwave. Note dents, stains, or malfunctioning components.
- Laundry appliances: Test the washer and dryer, checking hoses and vents for leaks or blockages.
- Garbage disposal: Turn the unit on and listen for unusual noises or problems starting.
Exterior and Common Areas (If Applicable)
If you rent a single‑family home or a unit with outdoor responsibility, document the exterior and shared spaces at move‑in.
- Walkways and driveways: Record cracks, holes, or uneven surfaces that could pose a safety hazard.
- Landscaping: Note existing lawn condition, trees, and garden beds, especially if you are responsible for maintenance.
- Parking spaces and storage: Confirm you have access to any included garage, parking spot, or storage area and record its condition.
What to Document at Move-Out
By move-out time, your focus shifts to demonstrating that you have left the property clean and in good condition. Many landlord associations provide detailed move‑out checklists highlighting cleaning tasks and repair expectations.
General Cleaning and Condition
- All rooms: Dust surfaces, clean windows, wipe walls and baseboards, and remove cobwebs. Record your cleaning with photos once complete.
- Floors: Vacuum carpets and mop hard floors, addressing stains where possible. Document any stains that could not be removed.
- Fixtures and hardware: Clean doorknobs, light switches, and outlet covers; check that all are present and functional.
Kitchen and Bathrooms
- Kitchen: Clean countertops, backsplash, cabinets, and appliances inside and out (including the oven and refrigerator). Remove all food and personal items.
- Bathrooms: Scrub tiles, grout, tub, shower, sink, and toilet. Clean mirrors and disinfect fixtures, and ensure cabinets and drawers are empty and wiped down.
Furniture, Personal Items, and Exterior Areas
- Personal belongings: Confirm all furniture and personal items are removed. Document any items intentionally left behind with the landlord’s consent.
- Closets and storage: Photograph empty closets, cabinets, and any storage units to show that nothing remains.
- Outdoor spaces: Remove belongings from yards or balconies and tidy areas you are responsible for, such as garages or gardens.
Final Steps Before Turning in Keys
- Perform a last walkthrough using your move-in photos and checklist as a reference.
- Take comprehensive move-out photos and videos of each room, including close‑ups of any pre‑existing damage you documented at move‑in.
- Return all keys, fobs, and garage openers as specified in your lease, and keep proof of the handover if possible.
Using Checklists, Photos, and Videos Effectively
Written checklists, photographs, and videos complement each other. Together, they create strong documentation that is more persuasive than any single method.
Benefits of a Formal Checklist
Housing authorities and property managers often provide standardized checklists for move-in and move-out to ensure consistency. These forms typically:
- List each room and key feature (doors, windows, walls, floors, appliances, fixtures).
- Include space to mark condition and add notes about specific issues.
- Provide signature lines for both landlord and tenant to confirm agreement.
| Documentation Method | Main Strength | Best Use Case |
|---|---|---|
| Written checklist | Structured and comprehensive | Recording condition room by room at move-in and move-out |
| Photos | Clear visual evidence | Showing damage, wear, cleanliness, and before‑and‑after comparisons |
| Videos | Context and continuity | Documenting entire rooms, walkthroughs, and how items function |
Tips for Strong Photo and Video Evidence
- Photograph each room from multiple angles before move‑in and after move‑out.
- Take close‑ups of any damage or wear with an object in frame to show scale.
- Include timestamps or keep images stored in cloud services that record dates automatically.
- Label folders clearly (for example, “Living Room Move‑In” and “Living Room Move‑Out”) so you can quickly find evidence if needed.
Communicating With Your Landlord About Walk-Throughs
Documentation is more effective when paired with clear communication. Many disputes can be avoided if tenants and landlords review checklists together and sign them at the end of each inspection.
Before Move-In
- Ask whether the landlord uses a specific move-in checklist and when it should be returned.
- Request a joint walk-through, so you can discuss any issues on the spot and have them noted on the form.
- Do not sign a move-in inspection until you have personally checked the unit thoroughly and added your own comments where necessary.
Before Move-Out
- Request a preliminary inspection a week or two before your move-out date so you know what the landlord expects you to fix or clean.
- Ask for an itemized list of any potential deposit deductions, ideally supported by photos.
- Attend the final move-out walk-through and bring copies of your move-in checklist and photo documentation.
FAQs: Tenant Walk-Through Documentation
How soon should I complete a move-in checklist?
Many checklists recommend that tenants complete the move-in inspection within three days of moving in, and some landlords allow up to a week. Check your lease and any instructions provided by the landlord. Completing it quickly ensures pre‑existing issues are clearly tied to the start of your tenancy.
Do I have to use my landlord’s checklist, or can I create my own?
Landlords and housing agencies often provide standardized checklists, especially for subsidized or regulated housing. You should use the official form when one is provided, but you can also keep a personal checklist, photo set, and notes for your own records. The more detailed your documentation, the better.
What counts as normal wear and tear?
Normal wear and tear generally means minor deterioration that occurs through ordinary use, such as small nail holes, slight carpet wear, or faded paint. Excessive damage, such as large holes, broken fixtures, or heavily stained carpets, is more likely to be charged against your deposit. Local laws and lease terms determine the exact standards, so tenants should review applicable regulations.
Should I sign a move-in checklist if I disagree with some items?
You should only sign after ensuring that all visible issues are accurately recorded. If you disagree, add written comments directly on the checklist and discuss them with the landlord before signing. You may also attach your own notes or photos to provide further detail.
Can photos and videos really help in deposit disputes?
Yes. Detailed before‑and‑after photos and videos, combined with signed checklists, create a strong record of the property’s condition at both move‑in and move‑out. These materials can be useful if you need to challenge deposit deductions, whether through informal negotiation or formal dispute processes.
Is it worth attending the move-out inspection in person?
Attending the final walk-through gives you a chance to answer questions immediately, show your documentation, and understand any potential charges. Many landlord resources recommend joint inspections for exactly this reason. If you cannot attend, ask to receive a copy of the completed move-out checklist and any photos used to justify deductions.
References
- Appendix 5: Move-In/Move-Out Inspection Form — U.S. Department of Housing and Urban Development (HUD). 2013-06-27. https://www.hud.gov/sites/documents/90106.pdf
- Condition of Rental Property Checklist — Colorado Department of Health Care Policy & Financing. 2019-05-01. https://hcpf.colorado.gov/sites/hcpf/files/Attachment%206-Rental%20Property%20Condition%20Checklist.pdf
- What To Document for Move-In or Move-Out Walk-Throughs — Rocket Lawyer. 2023-01-15. https://www.rocketlawyer.com/real-estate/tenants/communicate-with-your-landlord/legal-guide/what-to-document-for-move-in-or-move-out-walk-throughs
- The Walk-Through Guide Every Landlord Needs — Apartments.com Rental Manager Resources. 2022-08-10. https://www.apartments.com/rental-manager/resources/property-management/what-walk-through
- Move-In Checklist: What Every Tenant and Landlord Should Document — Redfin. 2023-02-14. https://www.redfin.com/blog/move-in-checklist/
- Apartment Move-Out Checklist for Landlords — American Apartment Owners Association. 2021-05-20. https://american-apartment-owners-association.org/property-management/landlord-quick-tips/apartment-move-out-checklist/
- Rental Property Walk-Through Checklist — Avail. 2022-11-05. https://www.avail.com/education/articles/rental-property-walk-through-checklist
Similar Articles






Read full bio of Sneha Tete